Students in kindergarten will be learning about pattern in a different culture. They will look at Kokeshi Dolls from Japan. You can view the powerpoint that introduces them by clicking on the link below.
http://cce.leesummit.k12.mo.us/lwelling/power%20points.htm
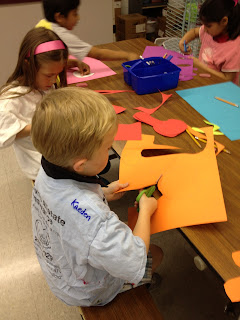
Kindergarten students did a "build a bear" lesson in art. They used a tracer to make a t-shirt. Following along with the teacher, they drew different types of lines on the shirt to create a design. Then they traced and cut a bear head and feet and glued them onto the shirt creating their bear.
How to Teach Children How to Cut with Scissors
Children have difficulty learning to cut with scissors. I will show you some fun ways to help children learn how to cut with scissors and develop some very good habits. This will make them much more successful in preschool, kindergarten, and lower elementary school.
- How should child be positioned:
When first learning, the child should be seated with hips, knees, and elbows at 90 degrees. You may need to pull the chair back from the table so elbows can be down at each side. If child is having difficulty, try having them place their elbows on the table while cutting with scissors. - 2
 child holding scissors upside downHow should child hold scissors:
Teach child to put the thumb in the smallest hole of the scissors, and 2-3 fingers in the big hole. The scissors should be held with the thumb "up" toward the ceiling. When children first pick scissors up they first will try and hold the scissors upside down. They should be corrected to use the thumb pointing to the sky. You may put a sticker on the thumb to remind them. Using scissors with holes that are similar in size and shape also help--it doesn't matter how the child picks up the scissors! Use the forefinger on the outside of holes to help stabilize the scissors. - 3
 How to determine which hand child prefers:
For those who have not established hand preference, try cutting with each hand to determine which hand shows better ability/control. Also be aware that many left-handers will prefer to cut right-handed. You may want to observe the hand that the child uses to feed himself with. - 4
 How to open and close scissors:
Show how to open and close scissors to snip paper Play "Open them Shut Them"--(use index and middle fingers to make the scissors motion) Open them shut them, open them shut them give a little snip, snip snip ( three quick snips with fingers); Open them shut them, open them shut them; (repeat scissors motion) Make another snip! Try these: Snip with rolled out playdoh; snip on index cards and construction paper to make "grass". - 5
 How to use the helper hand:
The helper hand (non-dominant hand) holds the paper with the thumb "up" for best control when turning the paper. Show how the helper hand moves to turn and guide the paper. (The scissors should remain in a relatively stable position, while the helper hand does the moving.)Do activities with two hands to prepare for scissor-cutting. These include: stringing beads or noodles, talking on older phone with push-buttons or dials. - 6
 How to find starting place to cut with scissors:
If holding scissors on the right hand, start cutting at the bottom (closest to you), on the right side of a form. If holding scissors on the left hand, start cutting at the bottom, on the left side of forms. This allows the helper hand to continue to guide/turn the paper in the most efficient way.
Students will begin the year with a study of the art element of LINE during September. Stay tuned to see some awesome artwork in the coming weeks.
Check out the pictures of the examples of the angry birds the students got to make. Go to the home page to see them.
ANGRY BIRDS WEEK COMING TO THE MAY WATTS ARTROOM
May 21-25
Classes who have earned points for good work and behaviour will be enjoying some 3d/form lessons creating some of the angry birds. We will be using craft foam scraps, paper towel rolls, clay, balloons, etc. to create some of those birds. Students will learn to create these figures in various types of 3d sculptures. A lot of fun taking a 2d picture and turning it into a 3d form.
We are springing into the art element of FORM for the next couple of weeks. All classes will be making shoes as their 3d form lesson. Kindergarten used paper to create these funny bunny slippers. Ms. Hemmens hot glued wiggle eyes and pompoms to the slipper.
Kindergarten learned about patterns in different cultures. Here is an example of KENTE CLOTH from Africa.
Our last project on the Element of Line was a colorful line sculpture. Students learned to fold, curl, bend, etc. strips of paper (representing lines). Folding back a little "foot" at the end of the paper provided more surface to put glue on so it will stick to our paper base. What a challenge. Ask your child about their sculpture when they bring them home.
Here are some pictures and examples from Mrs. Duranski's Kindergarten class:
Aug.22-26th
For the first week of Art, all students designed a paper graphic t-shirt. They drew examples of our cool tools, that we use weekly, from our school wide PBIS program.
http://www.pbis.org/ for more info.
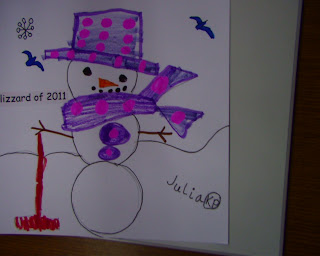
Posted below are some t-shirt designs by KD. All students t-shirts will eventually be displayed during the year on the office hallway bulletin board, as their class earns their gold tickets for the week.
Feb. 20th - Here is a sampling of the wonderful artwork the students did.
Feb. 7-11
Students will be working on a picture for the school's Square Art Fundraiser.
ART CLASSES 2ND QUARTER –PICASSO & MATTISE UNIT
Packets of student work will go home the week of Dec. 13th
This past quarter all the students have been learning about the artists Henri Mattise and Pablo Picasso. They watched a video of a reading of the book “When Pigasso met Mootise.” Then we did some online activities as a class. (All of this and LOTS more) is available on my blog
Each grade level did different lessons on these artists. Please take time to share this packet with your child and talk about it. You may want to hang up some of the pictures, get them framed, and send or give them to other relatives.
Ms. Sue Hemmens—
May Watts Art Teacher for 22 years
MATISSE STAINED GLASS WINDOWS
· Student cut out an interesting black frame area
· Student made a symmetrical or asymmetrical design
· with organic shapes using tissue paper
· All the pieces of tissue are glued down firmly
· Student created a Matisse style design
MATTISE FACE
· Student drew a realistic face
· Student drew facial features (eyes, etc) in correct place
· Student painted neatly
· Student painted with colors in the style of Matisse
PICASSO CUBISM PICTURE—3 musicians
· Student made a musician Picasso style
· Student used geometric shapes and a variety of papers
· Musician stays glued together
· Student includes their musician in the group picture
· Group decorated black paper
·
EVALUATIONS OF ART WORK GRADE 5
Characteristics of the fifth grade child in Art..
- love being designers-doing an actual assignment to design clothing, furniture, a house, etc.
- interested in learning new tools and techniques; capable of working with almost any material
- some lose confidence in their artistic ability because their drawings are not "real" enough or thik their classmates projects are better
- giftedness in art becomes more apparent at this age when children who love art and will devote long hours to doing it
- able to concentrate for much longer periods of time
http://www.pbis.org/ for more info.
Posted below are some t-shirt designs by KD. All students t-shirts will eventually be displayed during the year on the office hallway bulletin board, as their class earns their gold tickets for the week.
Feb. 20th - Here is a sampling of the wonderful artwork the students did.
Feb. 7-11
Students will be working on a picture for the school's Square Art Fundraiser.
ART CLASSES 2ND QUARTER –PICASSO & MATTISE UNIT
- love being designers-doing an actual assignment to design clothing, furniture, a house, etc.
- interested in learning new tools and techniques; capable of working with almost any material
- some lose confidence in their artistic ability because their drawings are not "real" enough or thik their classmates projects are better
- giftedness in art becomes more apparent at this age when children who love art and will devote long hours to doing it
- able to concentrate for much longer periods of time
April..Catepillars
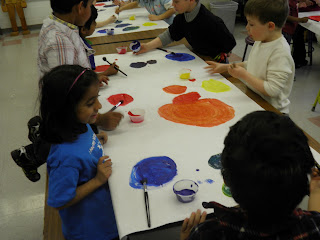
The week before spring break, the students walked into the artroom and the tables were covered with this long big sheet of white paper. They were given cups of the primary colors. First they painted a circle of their primary color. Next they poured a little bit of paint and their partner did also to try and create the secondary colors. I wish I had audio to go along with
these pictures as the kids saw two colors mixed to make a different color. We hung the long panels of paper to dry. Students were great about clean up. When they return from break, we will look at the book The Hungry Catepillar by Eric Carle. They will see how he made his drawings by painting on paper first, then using that to cut out shapes. We will make the catepillar by cutting out circles from the colors they made on those sheets.
Feb. 20th - Here is a sampling of the wonderful artwork the students did for the Square 1 Art Project. I even took the pictures with our new Elmo document camera...
Feb. 7-11
Students will be working on a picture for the school's Square Art Fundraiser.
Art class - second quarter.–PICASSO & MATTISE UNIT
This past quarter all the students have been learning about the artists Henri Mattise and Pablo Picasso. They watched a video of a reading of the book “When Pigasso met Mootise.” Then we did some online activities as a class. (All of this and LOTS more) is available on my blog. Go back to the home page.
Each grade level did different lessons on these artists. Please take time to share this packet that will come home this week with your child and talk about it. You may want to hang up some of the pictures, get them framed, and send or give them to other relatives. Enjoy
PICASSO HANDS WITH FLOWERS
Students looked at the print by Picasso. They used construction paper crayons to draw the flowers and stems. With the help of a partner, they traced their arms and then cut them out. They glued them on the paper so it looked like they were holding the flowers.
MATISSE FISH BOWLS
Students were given step by step directions (using our document camera and projector) as I drew and they could see each step on the screen. NO MORE STANDING AT THE CHALKBOARD AND KIDS NOT BEING ABLE TO SEE. They used oil pastels to color. Some classes had time to paint them.
PICASSO PUZZLE FACE
Students colored a picture of Picasso and then cut it into puzzle pieces (the idea of Cubism). Then they glue them back either in the correct way or mixed up.
If any of these are not included in the packet, they may have been absent OR the picture is hanging on our bulletin board OR I may be holding it for the Arts Festival.
Ms. Sue Hemmens - May Watts Art Teacher for 22 years!!!

Here is a cute way to remind your child where is the top of the scissors. They should put their thumb in the small hole (top of the gator) and other fingers in the larger hole at the bottom.
If any of these are not included in the packet, they may have been absent OR the picture is hanging on our bulletin board OR I may be holding it for the Arts Festival.
Ms. Sue Hemmens - May Watts Art Teacher for 22 years!!!

Here is a cute way to remind your child where is the top of the scissors. They should put their thumb in the small hole (top of the gator) and other fingers in the larger hole at the bottom.
Characteristics of the Kindergarten Child in Art.
- will leave out things in the picture that are not important to them
- feel no need to make colors relate to reality
- have little sense of scale...they are the center of the universe in their art
How to Teach Children How to Cut with Scissors
Children have difficulty learning to cut with scissors. I will show you some fun ways to help children learn how to cut with scissors and develop some very good habits. This will make them much more successful in preschool, kindergarten, and lower elementary school.
- How should child be positioned:
When first learning, the child should be seated with hips, knees, and elbows at 90 degrees. You may need to pull the chair back from the table so elbows can be down at each side. If child is having difficulty, try having them place their elbows on the table while cutting with scissors. - 2
 child holding scissors upside downHow should child hold scissors:
Teach child to put the thumb in the smallest hole of the scissors, and 2-3 fingers in the big hole. The scissors should be held with the thumb "up" toward the ceiling. When children first pick scissors up they first will try and hold the scissors upside down. They should be corrected to use the thumb pointing to the sky. You may put a sticker on the thumb to remind them. Using scissors with holes that are similar in size and shape also help--it doesn't matter how the child picks up the scissors! Use the forefinger on the outside of holes to help stabilize the scissors. - 3
 How to determine which hand child prefers:
For those who have not established hand preference, try cutting with each hand to determine which hand shows better ability/control. Also be aware that many left-handers will prefer to cut right-handed. You may want to observe the hand that the child uses to feed himself with. - 4
 How to open and close scissors:
Show how to open and close scissors to snip paper Play "Open them Shut Them"--(use index and middle fingers to make the scissors motion) Open them shut them, open them shut them give a little snip, snip snip ( three quick snips with fingers); Open them shut them, open them shut them; (repeat scissors motion) Make another snip! Try these: Snip with rolled out playdoh; snip on index cards and construction paper to make "grass". - 5
 How to use the helper hand:
The helper hand (non-dominant hand) holds the paper with the thumb "up" for best control when turning the paper. Show how the helper hand moves to turn and guide the paper. (The scissors should remain in a relatively stable position, while the helper hand does the moving.)Do activities with two hands to prepare for scissor-cutting. These include: stringing beads or noodles, talking on older phone with push-buttons or dials. - 6
 How to find starting place to cut with scissors:
If holding scissors on the right hand, start cutting at the bottom (closest to you), on the right side of a form. If holding scissors on the left hand, start cutting at the bottom, on the left side of forms. This allows the helper hand to continue to guide/turn the paper in the most efficient way.

.JPG)


No comments:
Post a Comment